May 31, 2012

Kitchen plans


Our electrician is in and they've started the plumbing.  This means major decision time for me!  I realized I was in a bit of trouble when our plumber asked me where I will have the kitchen sink so that he could install the drain.  Yikes!  I wasn't planning on committing to that just yet!  I'd only done some preliminary sketches up until Monday.
So I got down to business this week and have come up with this for our floor plan (with a couple of elevations as well).  All open to change, of course.  


We plan to use reclaimed wood on the floors throughout the main level so I want to keep the cabinetry simple.  We are hoping to use flat fronted, handle-less white cabinets from either the Nolte or Leicht line at Appliancehaus.
Something like the white in this Leicht kitchen below.

Modern Leicht Kitchen Cabinets: CONCEPT 40 | AVANCE

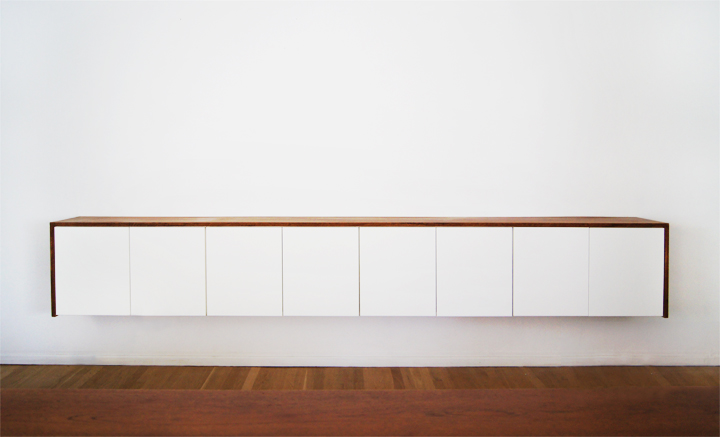
I love the two different materials used for this counter.  I was thinking of doing something like this but with a wood counter for the thicker end.  Although.... looking at this picture again, I do like the hit of black.  Maybe a wood counter would be too much with the floors. (??) 


I adore the marble wall in this kitchen!  I actually kind of just adore marble in general, but I really don't like how it etches so marble counters are definitely out.

 And as for this gorgeous wall, well, we unfortunately just don't have it in our budget.
So I think we will do something similar to what Downsview Kitchens did in my friend's house (sorry, no pics just yet) and use just one big piece behind the hood fan instead.

Judging by our last kitchen reno, I don't think this will be the final design.  But we're at least on our way.  I think I can safely tell our plumber where to put the sink drains anyway!


May 25, 2012

A little inspiration from some of my favourite blogs

Today, I thought I would post a few images that I find inspirational from some of my favourite blogs.
Love the bedside lights.  I'll have to plan the electrical in our house to do this. A couple of switches near the bed would be perfect.


Love the small mosaic tiles that make this tub. Not quite sure how this is actually built though.


Love the floors. We're planning on using reclaimed wood for our flooring as well. I hope it will look similar.


We want one or two runs of the stairs to have open risers to let light through and were thinking of something like this. I like the industrial feel of it.


These "hooks" are really just nails in the wall. So simple.


This was a DIY project made up of pieces of charcoal attached together with what looks like electrical tape. It could also just be a simple sculpture without the light.


I want to try installing these floors on the third floor. They are strips of plywood nailed down right on top of old carpeting! So inexpensive and yet so great looking! I'm thinking of painting them out white for a real Scandinavian look.


Isn't this pipe shelf great? I've seen it done by a lot of people recently, but I think I first found it at The Brick House.


Morgan at The Brick House actually removed the pipe shelves recently and installed this in its place. It's actually a series of Ikea kitchen cabinets with a wood surround. That girl is a genius! I will definitely have to try this somewhere.


May 22, 2012

Re-finishing the front doors

I have been crazy busy this week.  Really, no time to blog!  One thing I've been working on is the front doors.  What a job this has turned out to be!
This is what the front doors looked like before.  I love the charm of the old doors and would really like to keep them but had a few issues to deal with (as always!).


First of all, we decided to widen the front entrance to put it more in line with the door above it (that goes to the front balcony).  This was a bit of a one-thing-leads-to-the-next sort of thing that was probably not worth the large closet that started it all.  A word to the wise -- never design on the fly!
But we will get a grander front entrance out of it with side lights and a transom.  And, if all goes well, the original doors will be put right back in the centre of it all.  Hopefully worth the headache.


I really had to strip off some old paint to give the screen door a decent finish.  It had 3 thick layers on it!
I began by using paint stripper which worked but was tedious.  It took off the paint one layer at a time with a lot of waiting and scraping in between.


Our contractor saw me doing this and offered his "fan".  It is really just a super hot hair dryer but it strips off all 3 layers of paint at once!  Way quicker!
Even though I did this outside on a breezy day, I would recommend a mask for anyone using one of these things.  The fumes were pretty strong. 


But afterwards it looked like this.


And after using a bit more paint stripper for the corners, it looked like this. 


I filled in some holes with wood filler, repaired a corner with wood glue, and gave it a coat of tinted primer.  Little bits from the oak tree above it kept falling on the paint which didn't make it any easier.


Then I gave it a coat of eggshell black paint by Benjamin Moore (along with my trusty side kick!).


And this is how it came out!  I love it!


The heavier main door needed some TLC as well.  First I stripped off the old finish with furniture stripper, a scraper and steel wool.


I unfortunately put it upright to store it for the night and noticed these chips to the veneer the next day.  So bummed!  Should have been more careful.  I figure I can put a kick plate on it later and hopefully no one will ever notice.


After one coat of Minwax Special Walnut stain, the dark section under the windows still looked terrible.


So I gave it a second coat and it came out much nicer.  Can hardly notice the stain anymore.


I've still got to put a coat of polyurethane on it and finish off the inside in the same black as the screen door.  Hopefully I'll get to that soon. 


I even stripped the paint off the hinges and knobs.  I love the weight of them and thought they'd be great to re-use as well.


In other house news, we're almost finished framing out the third floor and will then be ready for electrical.  I'll get some pictures up soon.


May 13, 2012

Pouring the basement floor

Look what showed up at our house at 8:00 AM yesterday morning!  If I had any sons they would likely have been in heaven.  But our girls were all, "whatever, I'm not getting out of my pyjamas to see a big smelly truck".  


I thought it was pretty neat though.


They backed the truck right up the driveway and set up a chute through the side door.  Our contractor said this is the first time he's been able to do it this way.  On other jobs he had to carry the concrete from the street by wheelbarrow.  That's not light work!  I guess most 100 year old houses (like those in our neighbourhood) don't have driveways.


The PEX tubing is all encased in the concrete and will hopefully make it nice and warm next winter.


They flattened it all down, got out with the ladder, and left it for a couple of hours.


Then they came back with this machine to even out the surface.


Before it got too hard, we gathered the kids to make our mark on the house.


I just know they'll love seeing their little hand prints in the floor for years to come.


The whole family!


May 08, 2012

Windows!

It's amazing how different the house looks with new windows.  Almost doesn't look haunted anymore --well, maybe just the third floor.

windows3


We went with charcoal grey exteriors instead of the white that was originally there, but tried to keep some of the original look by adding grilles to the front bay windows. 


So many neighbours have commented on how nice the grilles look-- almost original to the house. I wanted them above eye level so we'd still have a clear view out (currently to a port-a-potty!)


We ended up buying our windows from Trimbo Windows.  Our contractors have worked with them for about 10 years and recommended them.  We did use Trimbo for the basement windows of our current house and were very happy with them, but I thought I should still shop around for such a large item.  


We looked at 3 other companies for windows.  One that does only wood windows, one that does both wood and vinyl, and another vinyl company.  Vinyl windows have come a long way apparently, and both wood window companies couldn't give us a better reason for buying wood other than the look of it.  And that is pretty much only from the inside as well with a clad window.  I personally couldn't tell the difference from the outside between a vinyl window and a clad wood window (which we would have done since we don't want the upkeep of wood exterior windows).  But the cost is considerably more.  They ended up being quoted to us at approximately 3 times the cost of Trimbo windows. That just seemed crazy!  We did get quotes from other vinyl companies as well and they all came in higher than Trimbo with nothing more to offer in terms of quality or energy efficiency.  This is probably because Trimbo manufactures their own windows.  


We couldn't be happier with our decision!  Honestly, the guys at Trimbo have been fabulous to work with.  It is a family run business and they are all so knowledgeable about their product.  They are also extremely fast!  We got our windows-- all 28 of them-- in 3 weeks!  I don't know if that is normal for them or if it was because of their long standing relationship with our contractor, or if we were just lucky with our timing.  I've talked to some friends who have waited months for their windows.  Holmes on Homes apparently works with these guys and I can see why.


This is my fake corner window.  The big one was a beast!  It took 4 men to carry it.  I couldn't watch that one going in-- I was too afraid of it getting dropped into the ravine!


After installing this one, our contractor pulled off all the Trimbo stickers and stuck them back on upside down.  This was their little joke on my dad.  They figured he would come by and flip that the window was installed upside down.  I unfortunately couldn't be there for that and don't know if the plan worked.  Funny if it did!


May 04, 2012

Finishing the basement floor

The basement of this house has gotten a lot more attention than I expected.  In fact we originally thought we would leave the basement until after we moved in, but one thing leads to another...  As mentioned in a previous post, we started the whole basement saga by deciding to replace all the old drains.  Always a good move in my mind to take care of all the hidden, functional stuff when it's fairly easy to do so.  But then, after underpinning the north-west corner and rebuilding the south-west corner, we practically had no original concrete floor left.  So we decided to just rip it all out.  By doing this we could gain a few inches of head height and add in-floor hydronic heating.  So that was the new plan.  After all the structural work was done, we leveled the sand and threw down some gravel.


Next we had to lay down a layer of insulation.  This is especially important with the in-floor heating to make sure it doesn't just heat the ground.  Our heating/air-conditioning guy usually uses 2" styrofoam for this step but I was surprised at how expensive it was.  I looked into other options and found a company called Insta-Insulation.  They sell these pieces of recycled garage doors.  They are polyurethane foam between two pieces of fiberglass with an R value of 12.  Seems so much better than styrofoam, no?  But here's the kicker-- they are almost a third the cost and they delivered in one day!


Our heating guy had never used them before but thought they were great.  
We fit the insulation in like puzzle pieces and laid a vapour barrier and wire mesh.


Next came the PEX tubes for the in-floor hydronic heating.


We're not going to bother heating the floor of the furnace room which is why it's bare in that one corner.  And we did decide to stick with forced air for the house so the floor heating in the basement will run off a specialized hot water tank.  


The black stuff on the walls is all damp-proofing.  This is going to be one comfortable basement!  We are now waiting for a rainy day so we can get our concrete guy to pour the floor.  He is apparently bogged with work in a subdivision but says he can't work there in the rain (since that job is open to the elements).  So on the first rainy day, he will squeeze in our little job.


Our other exciting news is that the windows have been delivered!!  What a difference!  We ended up using Trimbo Windows after speaking with 3 other suppliers but these guys deserve a post of their own.  Fantastic company!  I'll be back soon with more pics.