June 26, 2012

Totally gutted.

Remember the front door that I've been so painstakingly refinishing?


I stripped and sanded and stained the outside, and painted the inside a matte black.


Well, unfortunately it was pretty badly water damaged by the last rain storm and I just can't see us using it now.  
This door is unbelievably heavy, so I couldn't move it off the front lawn every time I ran out of time to work on it.  I did wrap it up and it seemed to work out in past rainy weather, but something went wrong during that last storm.


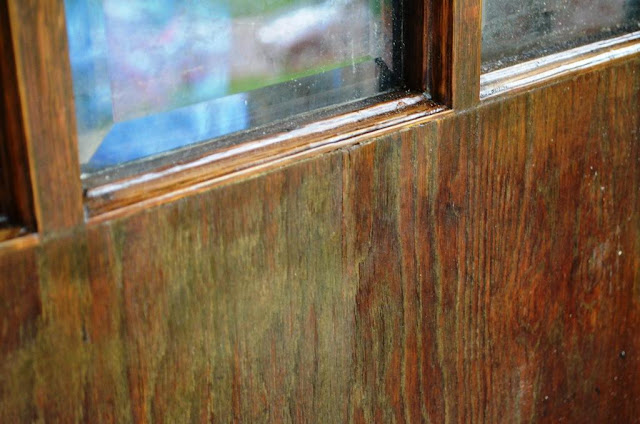
The bubbling is hard to see in the pictures of the front side, but is horrible on the inside.  I was completely gutted.


My husband felt sorry for me (he knew how much I wanted to re-use the original door) and tried to carry it up to the front porch for me.  We thought we might still be able to fix it.  But then, to make matters worse, he put his back out lifting it and was lying flat on the living room floor for the next day.
I just don't think this door was meant to be.


Of course, since I've had it in my head to use this door, I feel awful replacing it with a cheap metal one.  I looked around a bit and found a place that makes solid oak doors for a slightly more reasonable (but still expensive!) price.  They emailed me this image.  I really love it!  We wouldn't do the curves, however, since they almost double the cost of the door. 


Things don't always work out as planned, I guess.  


June 20, 2012

My 1958 Faisca wine crate

I've had this old wine crate for as long as I can remember.  It's a very sturdy wooden box that has gone with me wherever I have lived.  In university I used it as a bedside table to my low futon, sitting upside down.  These days I use it as a magazine holder.  


Just before my parents got married on August 16, 1958, my dad spent more money than he really had to buy my mom a crate of her favourite wine --Faisca rose from Portugal.  He says that he had to order it in advance from the LCBO and meant it to be a wedding gift for her.  They enjoyed that wine so much that he saved the crate and preserved it with a coat of varathane.  Somehow I ended up with it somewhere in my late teen years.


This evening I decided to get it up off the floor with some industrial looking casters I found at Rona. (The glass of red seemed fitting for the job, and let's face it, that's how I like to DIY)


One caster on with 4 tiny screws and a little washer.


Four casters on and this is what it looks like now!  Actually quite a bit easier to access as well.

June 18, 2012

I think I have FINALLY! finished painting and staining the front door.  The interior of the heavy main door was the last to be finished.  If you remember, this was what it looked like a couple of weeks ago.


I sanded it a bit more to bring it to this.


And today, I finally got around to priming and painting it a semi-matte black.  I did consider painting it chartreuse or something equally as bright, but didn't want to commit to any interior colours just yet.  I always think that you can't go wrong with black.  Tomorrow I hope to clean up the glass panes, re-install the original hardware and measure it up for ordering the frame (with 2 side lights and a transom window).  So far so good.


In case you didn't see it earlier, this is the flip side of the door --the exterior.


I spoke to Steve the stone guy today about our side steps and retaining wall.  This is where the dry stacked stone wall will be built with the stone steps coming down the side of the house.


To give you an idea of what I'm talking about, this is a wall that Steve built at my sister's house.  I think it's a work of art!


This is where we plan to put in 8, 4 foot wide, guillotine stone steps.


And this is the old foundation stone that Steve will use to build our retaining walls.  I like the idea of preserving its history, so he's going to leave the bits of the old mortar right on the stone.


June 12, 2012

Backyard retaining walls

All this rain has been reeking havoc on our sandy backyard. It's beginning to cave in on itself. 


We were always planning on building retaining walls for the area we previously dug out, but we were hoping to do it later on as part of a whole backyard plan. Unfortunately, we can't leave it very much longer, so I got the guys to work on it today.

The south side of the house will be our entrance to the backyard, so we want to do it up nicely.  The north side, though, will eventually be hidden by a deck.  So over there, we are really only concerned about function. The cheapest way to go?  For us it's rebar reinforced cinder block on a 3 ft concrete foundation. It's not the prettiest retaining wall ever built, but it will do the job.


We have our stone guy (so fun to have a stone guy!) coming in later this week to give us an estimate for the  south side stairs and retaining walls.  These will be built with the old foundation stone that I rescued from the dumpster.  He's as excited about re-using that old stone as I am.  Actually, I think he's even more excited.  In fact, I don't think I've ever met anyone as excited about stone as this guy.  And wait 'till you see what he does with it! 


June 07, 2012

The attic - with its cathedral ceilings

So this is what the attic looks like these days.  It will have 2 bedrooms (one on either end),  a 2-piece bathroom, 2 closets and a study/lounge area.  One of our trades thinks this will be the best space in the house --like a little retreat in the trees.
This is the lounge area to the left with our middle daughter's room in the back.


This will be the small 2- piece bathroom with a skylight over the sink.  We could only do so much with this space because of the sloping ceiling.


This is our middle daughter's room -- an addition on top of an existing flat roof.  The ceilings are much higher in this room (compared with the rest of the attic) because the house is wider in the back than it is in the front.  So we built this addition with a roof that spans the back of the house so that it wouldn't look cock-eyed from the outside.  There is a little jog in the roof-line, right in the middle, that will be filled with cedar shakes to match the gable ends of the roof.  Our engineer came up with this design and it has worked really well.


The only downside is that our oldest daughter's room in the front of the house has much less grand ceilings (we like to try and keep things even).


So we pushed her knee walls back to 2 feet.   This will give her at least a bit more floor space to try and compensate for the lack of ceiling height.  And I guess we'll have to get her some low furniture! 


A big problem we're facing with the attic is insulating the cathedral ceilings.  Attic insulation is extremely important to making the house energy efficient, since heat rises.  In fact, the building code wants us to put in a minimum of R-32 in the attic ceilings -- my dad and I would like to see R-40+ which is recommended by Eco-Energy Canada.  We have two choices to achieve this kind of  R-value.  We either double up the size of the ceiling joists (which would drastically reduce the already low ceiling height) and use either Roxul or Ultratouch, or we use spray foam insulation. 


I was not happy to hear this, since I am not altogether comfortable using spray foam because of offgassing, its permanence, and the toxic gas it emits when on fire.  But we are in a really tough spot with the attic, so we have decided to go ahead and foam the cathedral ceiling.  One small bonus of spray foaming this area is that we don't have to vent the roof.  But I will put up a strong and tight vapour barrier to prevent as much offgassing from entering the living space as possible.


June 03, 2012

Basement Framing

The last of the interior framing is done!  The basement.  As you can see in these pictures, it is very hard to photograph interior framing which is why I haven't blogged about it too much.  It just looks like a mess of 2x4's.  


This will be the basement TV room/playroom --the biggest room down there.


Still kind of hard to get the picture so I decided to try and mess around with floorplanner.com.  Up until now, I have done all of my space planning by hand on graph paper.  I still think I prefer it that way, but this was pretty neat to do.

And the best part is, that it can give you a 3D view of your space.


That you can move around!


Very cool.
We also started electrical work (beginning with the 3rd floor) last week. What a lot of work that is turning out to be!  I'll post more on that later.
And they started the plumbing.  Drains first.  


Things are really moving around here, and I am really starting to feel the stress of it now.  There are so many times that I wish we had an architect or a designer helping me with all the planning and decisions.  Or at least a nanny to take care of the kids, cook, and clean ;-)